To send a fax from a Windows application, you will use the FaxFacts Client software.
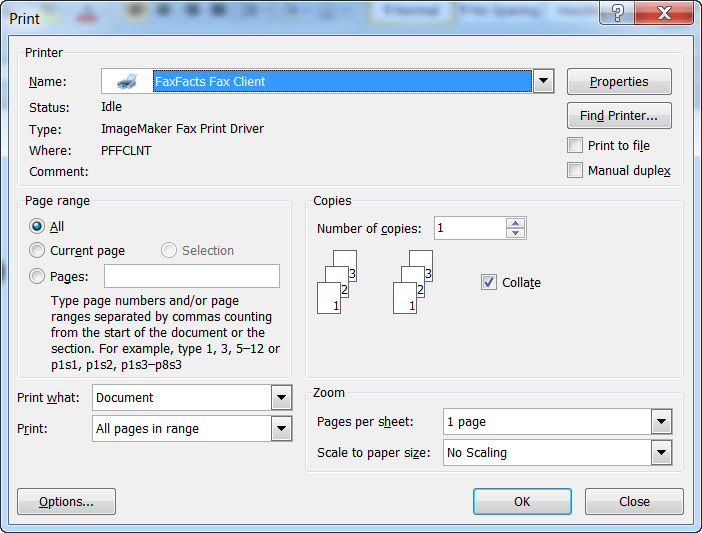
Open your application (for example, Microsoft Word) and select Print.
In the print dialog, choose the FaxFacts Fax Client printer:
The Fax Client screen will appear:
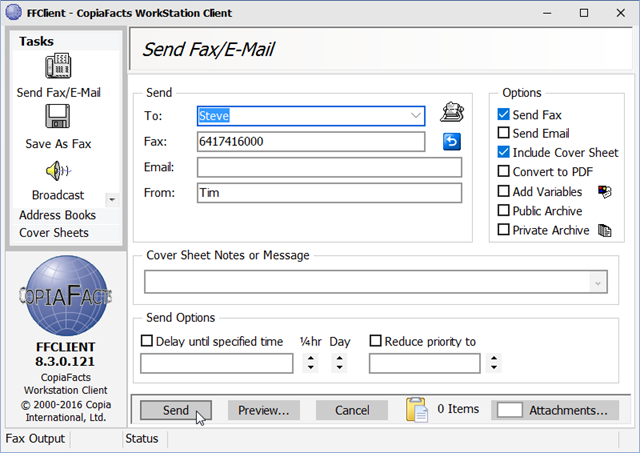
Enter the name and fax number for the recipient(s) (or pick them from your address book, if already configured, after clicking the 'rolodesk' icon). Your own name should appear in the From box. Check 'Include Cover Sheet' to include a cover sheet if you have already configured one.
 | For an example of setting up an address book based on an Excel spreadsheet, see this topic. |
You can also add attachments using the Attachments button, picking saved documents from your image catalog or other folders.
Use the Send Options box to select a time and priority for your fax. The default is that the fax will be sent immediately.
Click Send to send the fax. The dialog will remain open after the fax has been queued for transmission and you can either close it or minimize it for later use.
Instead of sending the fax, you can select Preview. This will cause the fax to be processed in exactly the same way as a real fax, with conversion of documents not already in fax format, creation of a cover sheet, and generation of fax header lines on each page, if specified. After a few moments the complete fax document will be opened for you to preview.
The Clipboard button also allows you to add the document to a virtual clipboard, to build up a collection of separate documents to be faxed together after the last of them has been 'printed'. Click the button to add the current printed document to a virtual clipboard. The files are saved (in your 'resources' folder) for the next send operation, when they will be added to the last document printed and sent in a single transmission. The number of saved documents is shown in the text to the right of this icon. The 'clipboard' is not cleared until a Send is done."