This sequence shows an example of how to improve the conversion of a 'problem' PDF file. It introduces techniques and procedures which can be used to fix almost any original document which does not convert well for faxing.
In this example a fax failed because after the incoming e-mail attachment PDF had been converted to TIF the image file was over a megabyte in size. The fax image was also dark and difficult to read.
Step 1: View the original document in its own application
It is ALWAYS necessary to look at the original document before you plan how to solve the problem of converting a 'difficult' document to a faxable TIF file. Here is a section of the document:
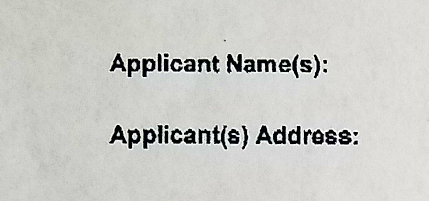
In this case, a PDF document nearly 4MB in size, we open it in Acrobat. The main problem can immediately be seen:
•The document has a medium-gray background color. When rendered to either black or white pixels for fax transmission, this makes 'dithered' areas with many single-pixel black items. Then the image is 'compressed' for faxing: this compression is optimized for black text only, where continuous short runs of black pixels forming letter shapes are efficiently encoded, but large black areas and single black (or white) pixels are significantly expanded in the image file.
In this case the PDF document appears to have been photographed, because there are small variations in the intensity of the gray shade. This will prevent us from using the BGCOLOR image option, which only works with uniform colors.
Step 2: Open the document in FFVIEWER
Open FFVIEWER and drag the PDF file onto it. After it has loaded, Open the Image Options Editor using the rightmost icon on the toolbar:
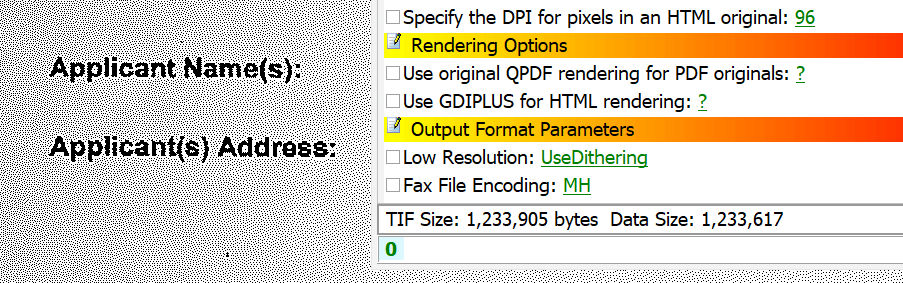
The first display shows the problem with the default conversion parameters:
•The gray background has become pixellated, which results in the file size reaching over a megabyte. The same would apply if it had been a light-colored background. The file size is shown at the foot of the Image Options Editor and in the thumbnail image on the left of the FFVIEWER window.
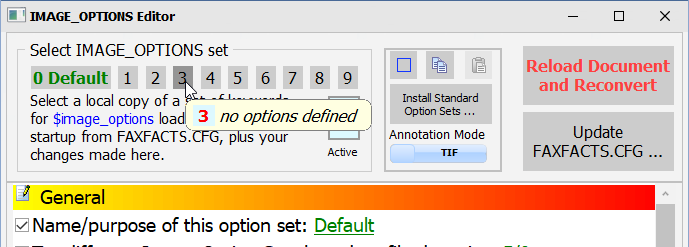
Step 3: Select a new Image Options Set to Handle this type of document
Here option 3 will be selected, because other options are already in use:
Step 4: Deal with the Gray Background
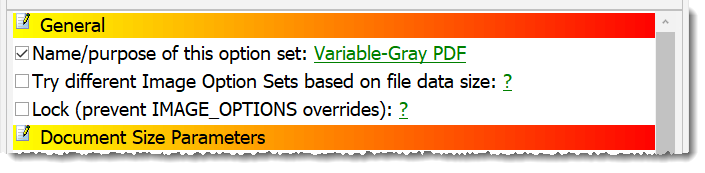
First enter a name for the option set. This will help you identify it when similar documents are encountered:
The usual method of dealing with small too-dark areas would be to increase the lightness of the whole image. This is done either by setting a positive value in the range 1-100 in the Brightness setting (a linear scale), or a number between 0.1 and 7 in the Gamma setting (a logarithmic scale). Using one of these methods minimizes the effect of the setting on other documents and on black text, and can be used in the default image options settings.
In this case of an entire medium-gray background different approach is needed, using the settting to Force light grays or colors to white. With lighter grays the default setting of 225 will be enough, but for this document a more aggessive setting is needed, particularly since the corners of this document are even darker than the screen shots. We first try a setting of 180:

After making any changes, you must reload and reconvert the document to see the effect:
An initial test using a setting of 180 shows in the thumbnail image that this value is not enough:
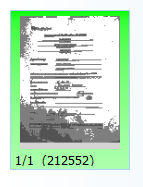
The final value of the setting for this document can be as low as 100 to eliminate all the gray background without affecting the legibility of black text.
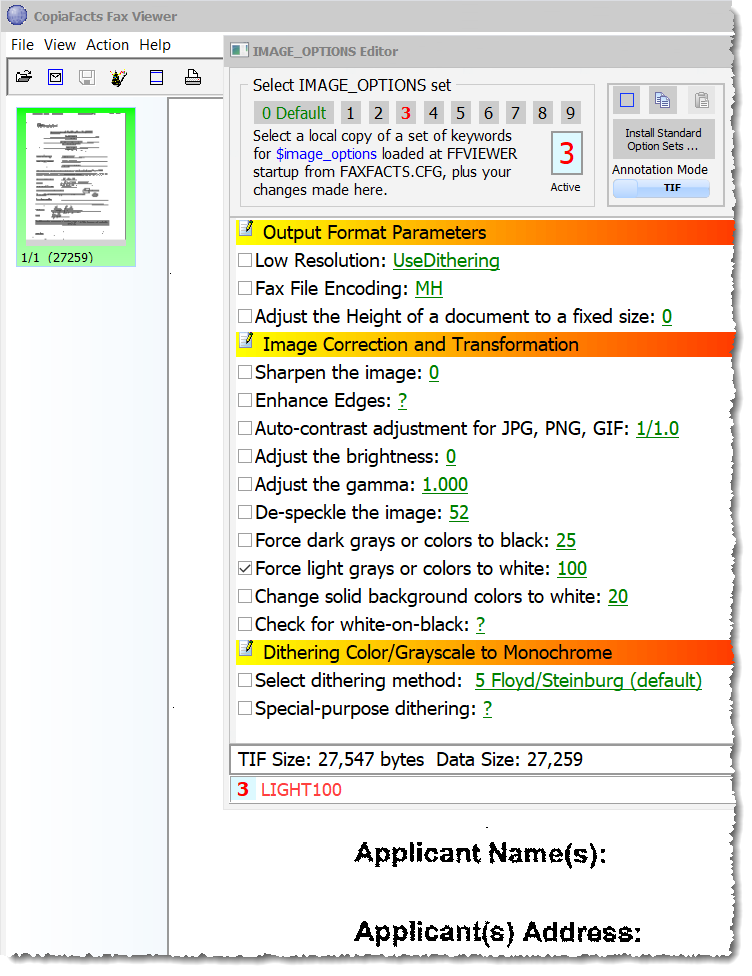
These options have reduced the size of the TIF file from 1,233,617 bytes to 27,259, greatly improved the legibility of the document, and reduced the time taken to send it, by about 98%.
Step 5: Save the Settings
Click the Update FAXFACTS.CFG button to save the settings. This action will add the following command to FAXFACTS.CFG:
$image_options 3 "<Variable-Gray PDF> LIGHT100" ; 2018.04.11 10:59
Step 6: Apply these Conversion Parameters
Now comes the hard part: how to apply these settings to a specific problem document.
•If this dark-background, document has arrived as a one-off aberration from a regular email-to-fax user, the best solution remains education. The document, just like a colored photograph, is just not something suitable for faxing in its current form.
•If a specific user of the CopiaFacts Client software needs to fax a lot of documents which need special processing, then you can modify the user profile (OWNER.UJP) for the user for this purpose. Include a command in the user profile to select this image option set:
$convert_options img3 ; select image options set 3 (gray PDF)
•A similar method can be used for a Job Administration customer, by modifying the OWNER.UJP or a JOBTYPE.UJP file.
•If an important email-to-fax user needs to send special documents occasionally, a pre-process script can be specified in the USR profile for the customer. This would be initiated, for example, by one of the following commands in the sender template (name.FST) file for the user:
$fax_pre-process checksize
$fax_pre-process checkname
The CHECKSIZE.IIF or CHECKNAME.IIF file would be in the scripts folder and would contain
; CHECKSIZE.IIF select PDF documents by size (over 1MB originals)
$type decision
; select the customer's photographed PDF documents (over 1MB originals)
$ife @FS_FILENAME 1000000
$set_var IMAGE_OPTIONS "light100"
$endif
$chain
; CHECKNAME.IIF select PDF by name (starting with BIG)
$set_var EXT "$fn:ExtractFileExt(@FS_FILENAME)"
$set_var FN "$fn:ExtractFileName(@FS_FILENAME)"
$set_var STARTFN @FN 1 3
$if @EXT = ".PDF"
$if @STARTFN = "BIG"
$set_var IMAGE_OPTIONS "light100"
$endif
$endif
$chain
Note that using the IMAGE_OPTIONS variable overrides other image options and has side-effects described in the linked topic.
•You can use the image options TRY keyword to set the option automatically only if the size of a converted page exceeds a defined limit. For more information, please refer to this topic. For example, you could use this method to apply in FAXFACTS.CFG:
$image_options 0 "TRY3/500"
$image_options 3 "LIGHT100"
In this example if a page of a document converts to more than 500kb of faxable TIF data (most plain text documents convert to no more than 50kb) then the conversion is automatically tried again using image option set 3. And as we have seen, this will then solve the problem for this type of document.
•If you do not discover the failure of an important fax until after the transmission, open the FS file from the STATUS program or simply in COPIAEDIT, add the command below (for this example), then save and resubmit the FS file.
$var_def IMAGE_OPTIONS "light100"
Step 7: Test the supplied Sample Files
In the FAXFACTS\DEMOIMG folder you will find three samples of documents which convert by default to large faxable TIF files:
Graybackground.PDF
------------------
Size with no adjustment: 254,250
Size with DESPECKLE52 DARK100 BGCOLOR15: 144,308
Bluebackground.PNG
------------------
Size with only SCIMG: 469.006
Size with SCIMG DARK100 BGCOLOR5 DITHER12: 104,801
Stonehenge.PNG
--------------
Size with only SCIMG: 1,061,009
Size with SCIMG DITHER12: 665,663
Size with SCIMG GAMMA2.0 DITHER12: 335,473
You can use these files to experiment with in the Image Options Editor: open FFVIEWER and drag each in turn to the FFVIEWER windoew. Then open the Image Options Editor, apply each option in turn to see the effect, remembering to reconvert each time.
If you wish, copy the settings by clicking the middle square 'copy' button, then select an unused numbered set (eg '1') and paste the settings by clicking the rightmost square 'paste' button. Then you have the settings in option set 1 and you can give it a descriptive name and save the settings in the CFG. Note that you will also have the settings in the default option set 0 after doing this, and you can restore the defaults by right-clicking the 0-Default button and reloading its original settings.
Step 6: Experiment, experiment!
If you have had issues reported about poor conversions of documents for faxing, experiment with your own settings.
Open a problem original in FFVIEWER (or open FFVIEWER and drag the file to it. Then use the Image Options Editor to choose an unused set of image options and experiment with all the settings to discover what they do and how you can improve the conversion quality. Remember to reload the original after each change.
If you discover settings which you prefer to the CopiaFacts defaults, save them as your own defaults. Otherwise use the procedures above to set defaults for specific document types.