Preparation
It is important to configure EMSETUP with your e-mail server credentials, and to have run this on the machine from which you wish to send files to Copia. There is an option in this program to enable an Explorer right-click menu option to 'Send Files to Copia'. This allows you to send trace and log files, and other files relating to problem issues directly to Copia support personnel. The files are sent by the EMDIRECT program and it is not necessary to have a COPIAFACTS engine running to send the files.
You can of course also send files in normal e-mail, but in both cases, if the attachments are extremely large, please contact support first for details of other options.
With EMDIRECT, the following methods are available for sending files
•Right-Click in Explorer and select "Send To...", and then "Copia Support".
•Right-Click in COPIAFACTS, FFEXTERN or GWMANAGER on the globe icon to send trace files.
•Right-Click on a node in CFCP to send trace files
•Right-Click in STATUS to send the FS, trace and other related files.
These options are described in the sections below.
Sending Files using Windows Explorer Right-Click
Right-click the file you wish to send and then move the mouse to "Send To" and then to "Copia Support using EMDIRECT":
|
|
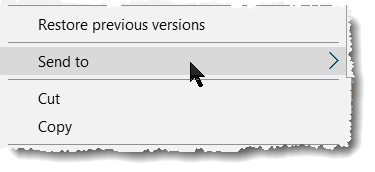
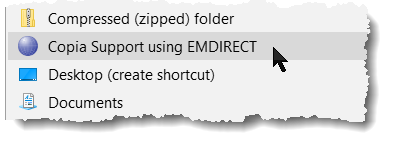
You can control-click to select up to 20 files before right-clicking on one of them, to send multiple files.
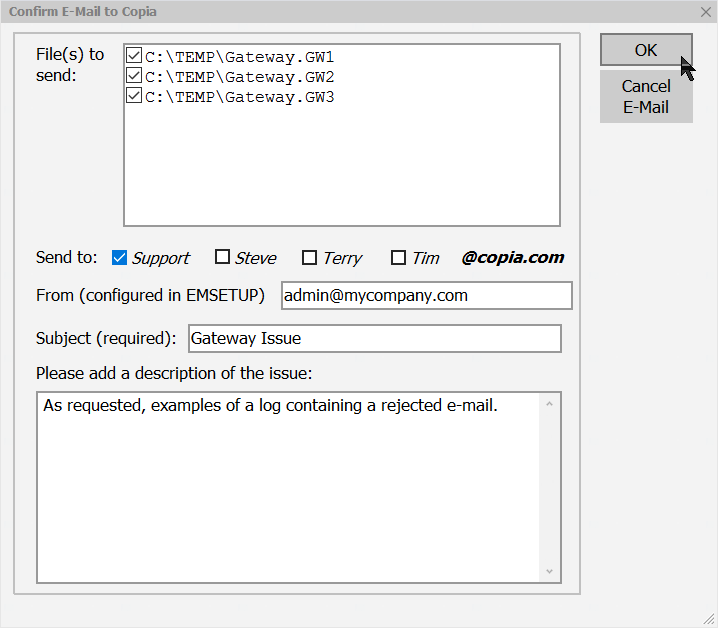
The EMDIRECT window will open. You must select one or more Copia staff members to whom the files are to be sent, and a subject line, before you can click OK. Please also add a brief description of the issue. You can add more files by dragging them from Explorer to this window, and you can de-select files by unchecking the associated checkbox. Files are sent to Copia in a password-protected ZIP attachment.
Right-Click in STATUS to send FS and related files
On an item shown in the STATUS program you can right-click to select Send Files to Copia:

This option will collect the following files:
•The selected FS file.
•The COPIAFACTS and FFTRACE trace files for the day of the transaction, if available and if the transaction is not more than six days old.
•The BAK and MIF files for the transaction, if it originated from a Gateway email-to-fax operation.
This invokes EMDIRECT with a pop-up window similar to that shown above, showing the selected files.
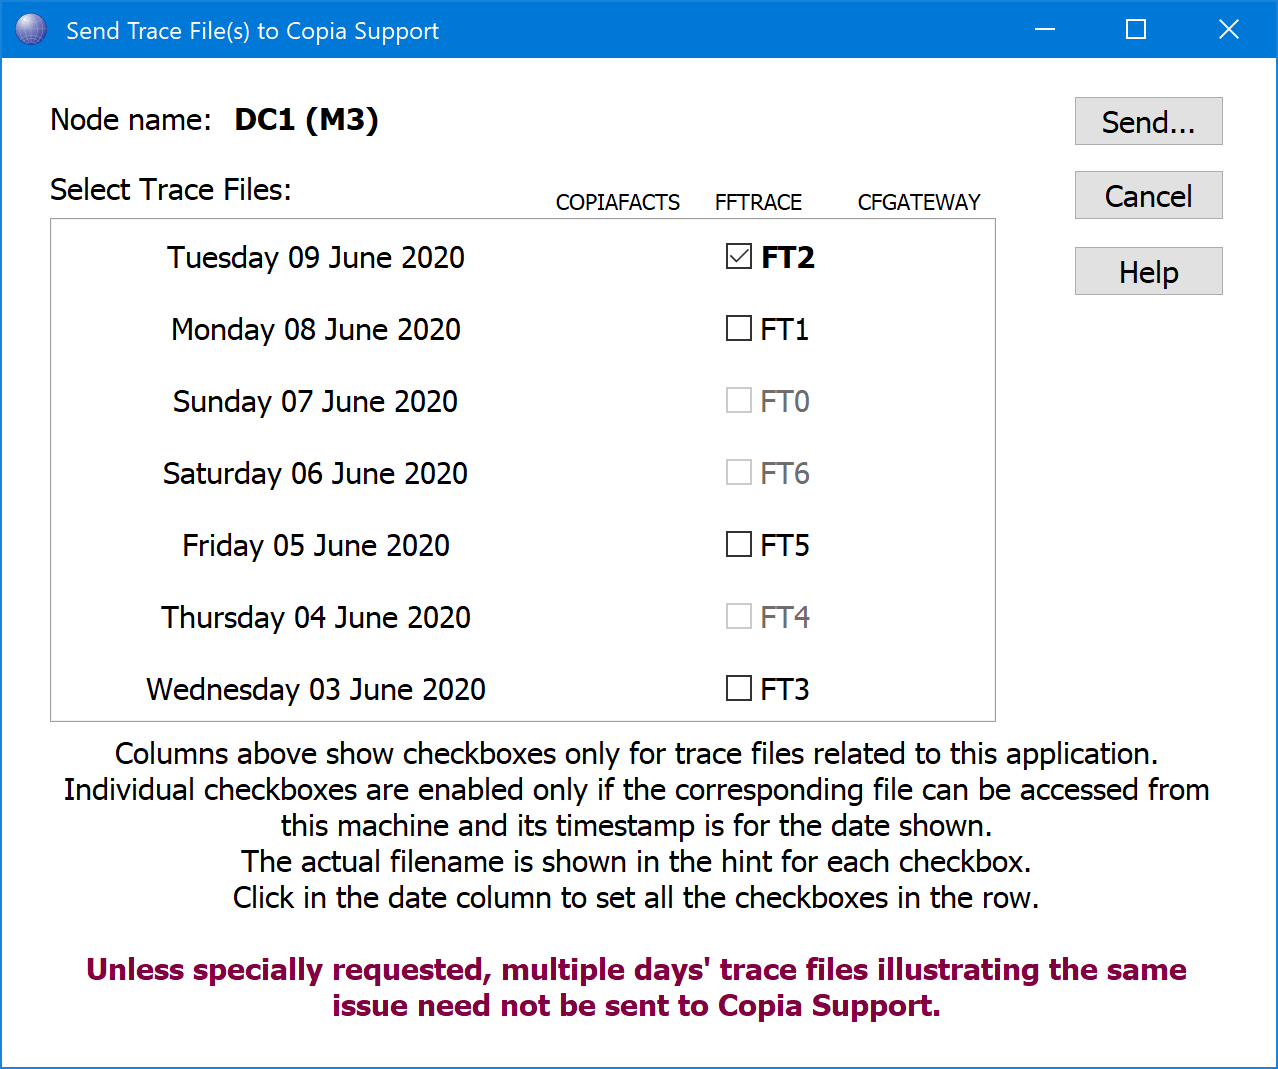
In addition to the methods described above to select trace files manually, the CopiaFacts programs CFCP, COPIAFACTS, FFEXTERN and GWMANAGER have a common dialog to select related trace files to be sent to Copia. This example is from FFEXTERN so only shows the applicable trace file checkboxes:
This dialog is accessed as follows:
| CFCP | Right-click the name of a COPIAFACTS node in the left panel to select service trace files from COPIAFACTS and those configured in FFTRACE for the COPIAFACTS libraries such as CF9EMAIL and CF9IMAGE. Gateway trace files can also be selected if the Gateway is installed on the node running CFCP. |
| Right-click the name of an FFEXTERN node in the left panel to select service trace files from those configured in FFTRACE for FFEXTERN, CVSINGLE and the CVSINGLE libraries such as CF9IMAGE. |
| COPIAFACTS | Right-click the 'globe' image in the COPIAFACTS desktop window tto select trace files from COPIAFACTS and those configured in FFTRACE for the COPIAFACTS libraries such as CF9EMAIL and CF9IMAGE. Gateway trace files can also be selected if the Gateway is installed on the node running COPIAFACTS. Left-clicking the globe will ensure that the trace is flushed to disk if it is not configured to flush after each write. |
| FFEXTERN | Right-click the 'globe' image in an FFEXTERN desktop window to select service trace files from those configured in FFTRACE for FFEXTERN, CVSINGLE and the CVSINGLE libraries such as CF9IMAGE. |
| GWMANAGER | Right-click the the 'globe' image in an GWMANAGER desktop window to select the service trace files for the Gateway. Left-clicking the same icon will open the current day's trace in TRCVIEW. |
The checkboxes on this dialog are only enabled when the corresponding trace file can be accessed from the machine on which the dialog is running. They are also disabled if only an old file (more than a week old) can be found with the applicable file name.
After selecting the trace files to be sent, clicking the Send button will open the EMDIRECT dialog shown above, to which additional files can be dragged.
 | When sending trace files, please select only those for the day(s) which are relevant to the issues for which you need support. Trace files can become very large. Only the current day's trace file(s) will show checks when the dialog opens. |
Right-Click in TRCVIEW to send Trace File
The File menu in TRCVIEW has an item which sends the currently-displayed trace file to CopiaFacts:
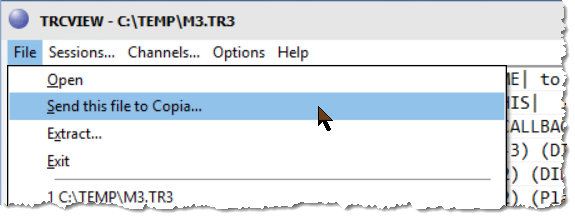
This invokes EMDIRECT with a pop-up window similar to that shown above, showing the current trace file.
General Notes on sending files to Copia
When you send files to Copia, it will expedite the resolution of the problem if you note the following important points:
•Please send trace files, when requested, in their original format, preferably 'zipped', and with their original file extensions, so that our special analysis tools can be used on them. This is not possible when we receive a file that has been truncated, converted to a Word document, or captured in a screen-shot.
•For performance reasons the COPIAFACTS program buffers trace files in memory. So if you copy the trace file to send to Copia the last couple of dozen trace lines will normally not be included in the file on disc. To avoid this problem, please left-click the Globe icon as described above, or uncheck 'trace to file' temporarily while you copy the file for transmission. If a problem causes a COPIAFACTS program crash, and is repeatable, you can also ensure that all the trace lines are written to disk by checking the debug option 'Flush Trace Buffer'. However you should take care not to leave this setting enabled during normal operation as it can severely impact performance in a heavily loaded system.
•If you are sending a number of CopiaFacts command files (for example .FS files) please ZIP the files before you attach them to e-mail. The timestamp on such file is often significant, but it is not preserved if the file is embedded directly in an e-mail. EMDIRECT will ZIP the files, with a password derived from your CopiaFacts serial number, when selected as described in this topic.
Please e-mail the information to support@copia.com, or to the support person who is dealing with it.